Driveway Pressure Washing – Best Practices
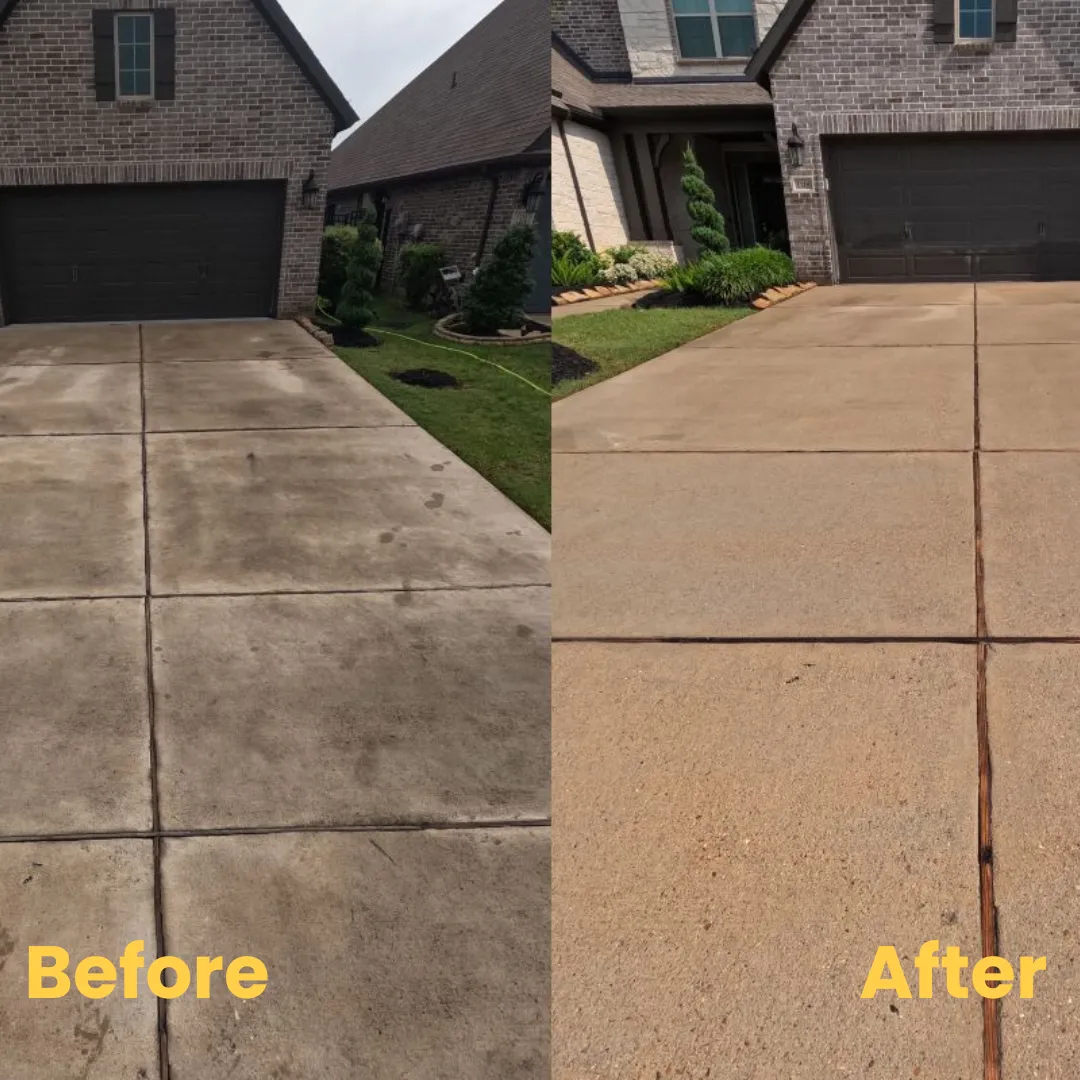
Like Hercules tackling the Augean stables, we’re about to initiate a mission to transform our grimy driveways into pristine surfaces. We’ve all seen those satisfying before-and-after photos of pressure washing, but there’s more to this task than meets the eye. From choosing the right equipment to mastering techniques that’ll make your neighbors green with envy, we’re going to uncover the secrets of effective driveway pressure washing. Stick with us, and you’ll soon discover why this seemingly simple chore is both an art and a science – and how you can become a master of both.
Key Points
- Choose a pressure washer with adequate PSI and GPM for your driveway’s size and material.
- Apply degreaser to stubborn stains and let sit for 15 minutes before pressure washing.
- Use a 25-degree nozzle for general cleaning, maintaining consistent sweeping motions.
- Clean in a systematic pattern from top to bottom, using parallel lines for even coverage.
- Apply concrete sealant annually after pressure washing to protect the surface from future damage.
Assessing Your Driveway’s Condition
Before beginning a driveway pressure washing project, it’s vital to thoroughly evaluate your driveway’s condition. We’ll need to look for obvious signs of wear and tear, such as discoloration, oil stains, mold, mildew, or cracks. Regular cleaning helps prevent stains and prolongs the lifespan of the driveway. These indicators will assist us in determining the level of cleaning needed and the suitable water pressure to utilize.
Let’s pinpoint areas with stubborn stains or tough dirt accumulation that will require extra focus. We’ll also inspect for areas where water collects or potential drainage problems that could impact our cleaning process. This evaluation will steer us in choosing the appropriate pressure washing equipment and methods.
While assessing the size and material of our driveway, we’ll take into account whether we’re dealing with pristine concrete or another surface. This information is fundamental in deciding the best cleaning approach. For instance, oil stains may necessitate pre-treatment or specialized cleaning solutions.
Choosing the Right Pressure Washer
When selecting a pressure washer for driveway cleaning, we’ll compare gas and electric models, weighing their PSI and GPM ratings for efficient cleaning power and effectiveness. Gas models typically offer higher PSI and GPM, making them suitable for larger driveways with stubborn stains, while electric models are more suitable for smaller areas and lighter cleaning tasks.
We’ll examine the trade-offs between the higher power of gas models and the convenience of electric units, keeping in view the size and condition of your driveway. Additionally, we’ll explore essential attachments and accessories, such as interchangeable nozzles, that enhance versatility and cleaning effectiveness for various driveway surfaces and contaminants.
It’s also important to take into account safety measures and the environmental impact of your chosen pressure washer.
Gas Vs. Electric Models
Choosing between gas and electric pressure washers is a crucial decision when tackling driveway cleaning. We need to ponder the power requirements for effectively pressure washing concrete driveways. Gas-powered models typically offer higher PSI and flow rates, providing superior force for dirt removal. This makes them ideal for tougher cleaning jobs on driveways and sidewalks, where electric models may fall short.
Additionally, taking into account and using overlapping strokes can enhance the effectiveness of a gas pressure washer, ensuring thorough and even cleaning.
When we’re dealing with stubborn stains and built-up grime, we’ll want the extra muscle that gas pressure washers bring to the table. They’re better suited for various surfaces, ensuring we achieve efficient and effective cleaning results.
While renting a gas pressure washer with a Surface Cleaner attachment can cost us around $130-$150 per day, it’s worth bearing in mind a long-term investment if we’ll be maintaining our driveway regularly.
For those of us committed to ongoing driveway care, purchasing a gas pressure washer like the Simpson 3100 PSI model for about $350 could be a smart move. This investment allows us to tackle our driveway cleaning needs whenever necessary, without the recurring rental costs.
PSI and Flow Rate
Understanding PSI and flow rate is crucial for selecting the right pressure washer for driveway cleaning. When it comes to dealing with tough concrete stains and grime, we need to take into account the power behind our cleaning equipment. Regular cleaning helps prevent stains and prolongs the lifespan of driveways, making it an important maintenance task. Gas pressure washers offer higher pounds per square inch (PSI) and flow rate, making them more effective at eliminating stubborn dirt from our driveways.
For example, a Simpson 3100 PSI gas pressure washer, priced around $350, provides superior force for cleaning concrete surfaces. This level of pressure ensures that water penetrates deeply into the porous surface, lifting and removing embedded dirt. While electric models are available, they often lack the necessary power for challenging cleaning tasks.
To achieve the best results, we should take into account the combination of high PSI and sufficient flow rate. A higher flow rate means more water is delivered to the surface, enhancing the cleaning process.
For those of us dealing with large driveways or particularly dirty surfaces, renting a gas pressure washer with a Surface Cleaner attachment can be a cost-effective solution, typically ranging from $130-$150 per day. This setup guarantees efficient and thorough cleaning of our concrete driveways.
Attachments and Accessories
In addition to selecting the right pressure washer, we’ll need to ponder the appropriate attachments and accessories to maximize our driveway cleaning efficiency.
One essential accessory to ponder is the Surface Cleaner. This attachment, particularly a stainless steel 15-inch model, offers efficient cleaning for driveways and costs around $100. It’s an investment that can greatly enhance our cleaning results and save time. Using biodegradable concrete cleaners and degreasers can also help in breaking down stubborn stains more effectively.
When deciding between purchasing or renting equipment, we should carefully weigh our options. Renting a pressure washer and Surface Cleaner costs about $130-$150 per day, while buying a Simpson 3100 PSI gas pressure washer is approximately $350. If we plan to use the equipment frequently, purchasing might be more cost-effective in the long run.
Let’s not overlook the water supply. We’ll need to make sure we’ve a reliable source with adequate pressure and flow rate to support our chosen pressure washer. By investing in versatile equipment and accessories suitable for various surfaces, we’re setting ourselves up for success in handling not just our driveway, but other cleaning tasks around our property as well.
Pre-Washing Preparation Steps
Before commencing a driveway pressure washing project, thorough preparation is necessary for optimal results and safety. We’ll guide you through the pre-washing preparation steps to make sure you’re ready for a successful cleaning.
First, we need to clear the area. Let’s remove all loose material from the driveway surface using a leaf blower or broom. This step is vital for achieving an even clean.
Next, we’ll relocate any items that could obstruct our work or be damaged by the pressure washer, such as:
- Bicycles leaning against the garage
- Children’s toys scattered on the driveway
- Potted plants lining the edges
- Outdoor furniture near the cleaning area
- Vehicles parked on or near the driveway
Now, we’ll protect surrounding areas by covering walls, doors, and in-ground plants with a tarp. Remember, we shouldn’t leave plants covered for too long to prevent sunlight deprivation.
As we prepare to start washing, we’ll consider the water flow direction and begin at the driveway’s highest point. By following these pre-washing preparation steps, we’re setting ourselves up for a comprehensive and efficient pressure washing experience.
Applying Detergent and Degreaser
After completing the pre-washing preparation steps, we’ll move on to applying detergent and degreaser to the driveway surface. This important step guarantees we’ll achieve the best results when we pressure wash our driveways together.
Let’s start by applying a high-quality degreaser to loosen tough stains and grease. We can use a degreaser attachment tool or a sturdy scrubbing brush to work the solution into the concrete. This process readies the surface for a more effective pressure washing experience.
Next, we’ll apply a suitable detergent across the entire driveway. It’s vital to let the detergent sit for about 15 minutes, allowing it to penetrate deep into the concrete and maximize its cleaning power. During this time, we can make sure even coverage and reapply to areas that may have dried.
Pressure Washing Techniques
When pressure washing a driveway, we’ll start by selecting the suitable nozzle for the task, typically a 25-degree tip for general cleaning.
We’ll then establish a systematic cleaning pattern, starting at the highest point of the driveway and working our way down in overlapping parallel lines.
It’s essential to maintain consistent back-and-forth sweeping motions with the spray wand, ensuring we cover the entire surface evenly for best cleaning results.
Proper Nozzle Selection
Selecting the right nozzle is a critical aspect of effective pressure washing. When it comes to driveway cleaning, we need to evaluate the specific task at hand and choose the appropriate nozzle accordingly. For general cleaning, a 25-degree nozzle is our go-to choice, providing a balance between pressure and coverage. For stubborn stains, we’ll opt for a 0-degree nozzle, which delivers maximum pressure for tough spots.
Let’s visualize the nozzle selection process:
- Inspect the driveway for different types of dirt and stains
- Examine the surface material (concrete, asphalt, pavers)
- Assess the level of cleaning required
- Check the color-coding on nozzles for quick identification
- Start with a wider angle and gradually decrease if needed
Systematic Cleaning Pattern
How do we guarantee a comprehensive and efficient cleaning process when pressure washing a driveway? It’s all about following a systematic cleaning pattern.
We’ll start at the highest point of the driveway, allowing debris to flow downward as we work. This approach ensures we’re not pushing dirt onto already cleaned areas.
We’ll work methodically in one direction, ensuring thorough coverage of the entire surface. Our technique involves using consistent back and forth sweeping motions with the spray wand. This method is vital for effective driveway pressure washing, as it leaves no spot untouched.
Before we begin the main cleaning, we’ll apply detergent to the entire surface and let it stand for 15 minutes. This pre-treatment helps loosen stubborn dirt and stains.
After the waiting period, we’ll rinse the detergent away, making tighter sweeps with the spray wand to guarantee all cleaning agents are removed.
Tackling Stubborn Stains
Tackling stubborn stains demands a strategic approach when pressure washing your driveway. We’ve found that using a degreaser is vital for effectively removing oil stains and other tough blemishes. Before we start pressure washing, we always pre-treat these stubborn areas with a high-quality degreaser.
Here’s what we envision when tackling tough stains:
- A driveway marred by dark, oily patches
- A bottle of potent degreaser in hand
- The satisfying sight of grease loosening as we apply the product
- A pressure washer at the ready, primed for action
- The gradual transformation as stains lift away
We can’t emphasize enough how essential degreasing is for best results. It’s not just about applying pressure; it’s about smart preparation. By loosening the oil and grease beforehand, we guarantee that our pressure washing efforts are far more effective.
This pre-treatment step is what separates a mediocre cleaning job from a truly immaculate driveway. We’re all in this together, aiming for that flawless finish that makes our homes stand out. With the right approach, we can conquer even the most stubborn stains and achieve a driveway we’re proud to show off.
Post-Washing Care and Maintenance
Having completed the pressure washing process, it’s vital to focus on post-washing care and maintenance. We’ll start by applying a concrete sealant to protect the surface from future stains and damage. This step is essential for maintaining the pristine look we’ve achieved.
Next, we’ll regularly inspect our driveway for cracks or gaps, addressing them promptly to prevent further deterioration. Remember, small issues can quickly become significant problems if left unchecked.
To maintain our pressure washer in top condition, we’ll use a pump saver to prevent corrosion and pump failure. Proper storage is also crucial when the washer isn’t in use, extending its lifespan and ensuring it’s ready for our next cleaning session.
Let’s follow these maintenance guidelines to maximize efficiency and longevity:
Task | Frequency | Importance |
Apply sealant | Annually | High |
Inspect for cracks | Monthly | Medium |
Use pump saver | After each use | High |
Proper storage | Always | Medium |
Follow manufacturer’s guidelines | Ongoing | High |
Safety Precautions and Best Practices
Safety should always be our top priority when pressure washing driveways. We must wear appropriate safety gear, including goggles and gloves, to protect ourselves from potential injuries during the driveway pressure washing process. Let’s follow the manufacturer’s guidelines meticulously to secure and guarantee safe and effective use of our power wash equipment.
To maintain a secure environment, we need to:
- Keep children and pets away from the work area
- Avoid pointing the spray wand at people, animals, or delicate objects
- Check for obstacles or hazards before starting
- Use the correct nozzle and pressure settings for the job
- Maintain a firm grip on the spray wand at all times
We’re responsible for creating a safe workspace, so let’s thoroughly inspect our surroundings before beginning. By adhering to these best practices, we’ll minimize risks and maximize efficiency during our driveway pressure washing tasks.
The Takeaway
We’ve covered the essential steps for effective driveway pressure washing. While some might argue it’s a time-consuming process, we assure you the results are worth the effort. To visualize the impact, imagine your driveway as a canvas: pre-washing preps the surface, pressure washing removes years of grime, and post-washing care seals in the pristine finish. By following our technical guidelines and safety precautions, you’ll achieve professional-grade results while protecting your investment.